Geeklog IvySOHOプロジェクト
テーマの作成方法
Geeklogのテーマは簡単に手早く作成できます。HTMLファイルを扱えればテーマを作成することができます。PHPを覚える必要はありません。
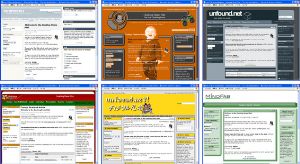
本家デモサイト( http://demo.geeklog.net)
で見ることができる89種類のテーマの一部
テーマの作成
初めに、(もしあれば)実行したいものに最も近い既存のテーマをコピーしてください。しようとすることが根本的に違っている場合(そう願っていますが)、いずれかひとつのコピーを行います。テーマに付けたい名前に既存のテーマをコピーしてください。(テーマの名前にスペースを入れないでください。)
cp -R /path/to/geeklog/public_html/layout/Yahoo /path/to/geeklog/public_html/layout/My_Theme_Name_No_Spaces
新しいテーマのディレクトリに変更してください。
cd /path/to/geeklog/public_html/layout/My_Theme_Name_No_Spaces
ニーズに合うようにテンプレートを編集してください。テンプレートは、一般的にHTMLファイルの一部であることを覚えておいてください。作成したディレクトリは、Geeklogに必要なテンプレートをすべて保持していますが、見た目に大きなインパクトを与えるためには少し修正が必要になります。
特に、以下は変更したいと思われるテンプレートです。
- header.thtml
- footer.thtml
- blockheader.thtml
- blockfooter.thtml
- storybody.thtml
- storybodytext.thtml
- featuredstorybody.thtml
- featuredstorybodytext.thtml
- archivestorybody.thtml
- archivestorybodytext.thtml
- style.css
Geeklog はサイトのヘッダーを作っているheader.thtmlでスタートし、それから続けてブロックの左カラムを囲い込みます。 (変数 {left_blocks} とleftblocks.thtmlファイルを探してください。) サイトの中央部分は、storytext.thtml、storybodytext.thtml (ノーマル記事用)、 featuredstorytext.thtml、featuredstorybodytext.thtml (特集記事用) のテンプレートファイルを使って作られた記事で構成されます。それからfooter.thtmlファイルがブロックの右カラム (変数 {right_blocks}、ファイルright_blocks.thtml)とサイトのフッターを作ります。ブロック自体はblockheader.thtmlとblockfooter.thtmlのファイルで構成されます。
基本レイアウト:
上記は Geeklogのメインページと記事がどのように書かれるかを説明しています。Geeklogで見るいろいろなエディタやリスト、またカレンダーやGeeklogのほとんどの部分に対して、もっと多くのテンプレートが存在します。
※http://geeklog.ivysoho.com/ テーマをtest に変更すると、テーマの詳細利用状況を確認できます。(Ivy SOHO追加)
どのテンプレートファイルが、Geeklogのどの部分に使われるかを明示している完全なリストが現在ありません。しかしほとんどの場合、テーマのレイアウトディレクトリのファイルとディレクトリの名前を見れば、その使用がはっきりします。Geeklogの一定の部分を作るのに、どのテンプレートファイルが使われているかわからない場合は、URLを見てください。そこでPHPファイルの名前がわかります。たとえば、ユーザープロファイルを見るときは、users.phpファイルとなります。そのファイルを開けて、 '.thtml'を検索してくだい。プロファイルでは、次のような行になっています。 (関数 userprofile()で):
$user_templates = new Template ($_CONF['path_layout'] . 'users');
$user_templates->set_file (array ('profile'=>'profile.thtml', 'row'=>'commentrow.thtml', 'strow'=>'storyrow.thtml'));
テンプレートファイルprofile.thtml、commentrow.thtml、storyrow.thtmlの使用を知るためにPHPコードを理解する必要はありません。一行目は、テーマのレイアウトディレクトリ内のusersディレクトリからこれらのファイルが取り出されていることも示しています。
テーマを編集した後、それをテストする準備ができます。http://mygeeklogsite/usersettings.php?mode=preferences へ行って、テーマのドロップダウンで新たに作成したテーマを選択してください。(テーマの名前は、テーマ用のディレクトリと同じ名前であることに注意してください。)
最終的には、テーマの画像ディレクトリのロゴや他の画像をアップデートする場合もあります。
テンプレートシステムに関しては、PHPLibのテンプレートクラス(http://phplib.sourceforge.net/) を使用しています。そこのドキュメントを読んで、それがどのように実行されているか知るために、任意で /path/to/geeklog/system/classes/template.class.php を見てください。この知識があっても、どのテンプレートがお互いに関連して使われているのかはっきりしない場合があります。 (たとえば、storybody.thtmlとstorybodytext.thtmlが一緒にひとつの記事の完全なフォーマットを作っています。)ご質問がある場合は、http://lists.geeklog.net/listinfo/geeklog-usersでメーリングリストに参加するか、 #geeklogの irc.freenode.netでIRCでチェックしてください。
テーマと WYSIWYG エディタ: Geeklogで使われるテンプレートファイルは、完全なHTMLファイルではなく、Geeklogが固有のHTMLドキュメントを作るために組み合わせたHTMLの部分だけを含んでいます。しかし、これはWYSIWYG HTML エディタのいくつかを混乱させていると思われ、そのエディタが、ファイルから紛失してGeeklogで使えなくなったと考えたHTMLを追加してしまう傾向があります。
テーマを編集するには、シンプルテキストエディタを使うことをお勧めします。
テーマのPHP:テーマのヘッダー、たとえばheader.thtmlファイルなどのPHPを使うことができます。カスタムPHP機能を使用したい場合は、あなたのテーマディレクトリ内のfunctions.phpファイルにその機能を入れることができます。
外観の違う左ブロックと右ブロック:左右のブロックを違った外観にできます。詳細はGeeklogホームページのこの記事をご覧ください。
ポーリング:ポーリング結果のグラフィック・ディスプレイ内のマルチカラーバーを使うために、pollbooth/pollvotes_bar.thtmlのテンプレートファイルにある{answer_counter}と{answer_odd}の変数を利用することができます。{answer_counter}は、それぞれの回答に対する連続番号に替わることになります。従って、bar{answer_counter}.gifはbar1.gif、bar2.gif等になります。このGIFそれぞれに違った色を付けると、各回答にも違った色をつけることになります。
{answer_odd}は回答ごとに0と1を交互に使うことになるので、bar{answer_odd}.gifは、一番目、三番目、五番目等の回答にはbar0.gif、二番目、四番目等の回答にはbar1.gifとなります。
右カラムの左ブロック:$_CONF['left_blocks_in_footer'] ( config.php) は、かなり変わったオプションです。{left_blocks}変数をサイトのフッター(たとえば、footer.thtml)で使えるようにしますが、同時にヘッダー(header.thtml)では使えなくなります。
これは、右側にブロックを作りたいときだけ二つのコラムレイアウト(一つのコラムはブロック用で、もう一つはコンテンツ用)に使えます。通常左ブロック(たとえば、article.phpか管理者ページなど)を表示しているだけのページでは、まったくブロックなしで終わせるので、ブロックすべてを右に移動させると期待通りに動かなくなります。$_CONF['left_blocks_in_footer'] = 1を設定すると、これを修正しますので、内部ではまだ左ブロックとして扱われているブロックでも、実際には右に表示されます。
テーマのheader.thtml、footer.thtml、leftblocks.thtmlにはおそらく調整が必要になります。config.phpで変更されていない $_CONF変数を残して、代わりにそれをテーマのfunctions.phpに上書きすることをお勧めします。そうすれば、たとえば“ノーマル”テーマか右にブロックがあるテーマかをユーザーが選択できます。
新しいテーマファイルを紛失したら、Geeklogで送られるデフォルトテーマ(professional)からコピーできます。
管理テンプレート
Geeklog 1.4.0 は、多くのテーマ変更が必要だった改訂管理セクションに付いています。従って、Geeklog 1.4.0が付いているので、管理ディレクトリがあるテーマの管理ディレクトリ全体をGeeklogのデフォルトテーマ(professional)から戻し、後でもう一度管理テンプレートにあなたが行った修正を適用することをお勧めします。
その他の変更
- コメントテンプレートcommentbar.thtmlとthread.thtmlが、コメント処理の変更のために変更されました。
- 新しいテンプレートファイルを含んでいる新しいディレクトリtrackbackとadmin/trackbackが、トラックバックのサポート用に追加されました。
- 新しい変数{send_trackback_link}、{send_trackback_url}、{lang_send_trackback_text}が、記事とアーティクルテンプレートのファイル内で利用できます。現在の記事に対するトラックバックのコメントが送信できるURLやリンクと同じように、完全なリンクができます。
- linksとadmin/linkディレクトリが移動しました。リンクは現在プラグインで、プラグインのテンプレートは/path/to/geeklog/plugins/links/templatesで見られます。
- pollboothとadmin/pollディレクトリが移動しました。ポーリングは現在プラグインで、プラグインのテンプレートは/path/to/geeklog/plugins/polls/templatesで見られます。
- preferences/profile.thtmlテンプレートには現在パスワード変更用の追加フィールド(古いパスワード、新しいパスワード用の確認フィールド)があります。
- 検索フォームsearch/searchform.thtmlには、ページごとの検索結果の数に関して新しいオプションがありますが、リンク検索のためのハードコードオプションは移動しました。 (リンクは現在プラグインなので、{plugin_types} オプションの一部となります。).
- 遠隔認証を利用してユーザーがあなたのサイトにログインできるように計画している場合は、追加変数{services}を、loginform.thtmlテンプレートファイルに追加しなくてはいけません。
- あなたのサイト上でトラックバックができるように計画している場合は、記事のトラックバック部分へのリンクを記事テンプレートファイルに追加することになるかもしれません。たとえば{start_trackbacks_anchortag}{trackbacks_with_count}{end_trackbacks_anchortag}となります。例として、専門テーマの記事テンプレートファイルをご参照ください。
There are no mandatory theme changes in Geeklog 1.3.11, so themes made for Geeklog 1.3.10 will work just fine without any modifications.
A few minor additions / new options have been introduced:
- A new variable, {camera_icon}, can now be used in the story and comment template files to display the small camera icon (the same as in the Who's Online block) to link to the author's user profile (only if they uploaded a userphoto).
- The {layout_url} variable is now available in the templates for the story, link, and event submission forms.
- Also in the submission forms, a variable {separator} is now available in addition to the misspelled {seperator} variable.
- A new variable, {calendar_mode}, can be used in the calendar/events.thtml template file to ensure that the "add event" link will take the user to the proper event submission form for either the site calendar or the personal calendar.
General note: To upgrade your custom theme for use with Geeklog 1.3.10, you can simply copy over any new template files from the Geeklog default theme.
The biggest change in Geeklog 1.3.10 is that we now ship it with only one default theme (the Professional theme, kindly provided by Victor B. Gonzalez) and that the previously included themes are now available as a separate download.
Admin templates
Most themes don't change the template files in the theme's admin directory, so you can often save yourself a bit of work by simply replacing the entire admin directory with the one from the Geeklog 1.3.10 distribution.
- The story editor, admin/story/storyeditor.thtml includes new options for the story archiving and for editable story IDs. It is recommended to make a copy of this file and re-apply any changes you may have made to your copy again afterwards!
- The list of polls, admin/poll/polllist.thtml now supports paging, i.e. uses the {google_paging} variable.
- The list of events uses paging and a row number now (files affected: admin/event/eventlist.thtml and admin/event/listitem.thtml).
- The plugin editor, admin/plugins/editor.thml, now displays 2 version numbers for the plugin: The installed version and the (possibly differing) version of the actual code. In the latter case, it will also display an update button.
The list of plugins, admin/plugins/pluginlist.thtml and admin/plugins/listitem.thtml, also displays the 2 version numbers and now supports paging when more than 25 plugins are installed.
- The topic editor, admin/topic/topiceditor.thtml, contained a hard-coded "10" for the default number of stories per pages. The new variable {default_limit} provides the actual default value now.
- admin/mail/mailform.thtml has been changed to look slightly less ugly ...
Other templates
- Added two new templates for the new story archive feature. This allows you to theme olderstories differently. By default Geeklog 1.3.10 ships with these template files not themed and the same as a standard story. The new template files are
- archivestorytext.thtml
- archivestorybodytext.thtml
- Due to various changes in the comment engine, it is recommended that you copy over all the comment template files from the comment directory (comment/reportcomment.thtml is actually a new file).
- In calendar/dayview/dayview.thtml, i.e. in the calendar's day view, the hard-coded am/pm times have been replaced by variables of the form {xx_hour} (where 'xx' is 0-23).
- In the event details template, i.e. in calendar/eventdetails.thtml, the event type and an edit icon were added (this change was only made in Geeklog 1.3.10rc3).
- A "location" field was added in the user's profile: Added {lang_location} and {user_location} in users/profile.thtml and {lang_location}, {lang_location_text}, and {location_value} in preferences/profile.thtml.
Optional changes
The following is a list of optional changes (mostly new variables that are now available). This information is mostly of interest for those who want to develop their own themes.
- {article_url}, i.e. the full URL to an article, is now also available in article/printable.thtml.
- In links/linkdetails.thtml the new variable {link_actual_url} now contains the actual link URL (instead of a link to Geeklog's portal.php).
- The following variables are now available in calendar/eventdetails.thtml: {event_state_name} (full name of the state), {event_state_only} and {event_state_name_only} (abbreviated and full state name without the comma), {event_edit} (link to edit the event, if allowed for the current user), {edit_icon} (same, but with the edit icon instead of a text link), {lang_event_type} and {event_type} for the event type
- The topic image is now available through the {topic_image} variable in topicoption.thtml and topicoption_off.thtml
- Several class names have been introduced so that the various lists that Geeklog uses can now be styled individually: list-feed, list-new-comments, list-new-links, list-new-plugins, list-older-stories, list-personal-events, list-site-events, list-story-options, list-whats-related (the names should be self-explanatory).
Use {list_class_name} to get the actual class name, and {list_class} to get class="classname".
- Several class names have been introduced so that the 2 small calendars in the calendar's month view can be styled: .smallcal, .smallcal-headline, .smallcal-week-even, .smallcal-week-odd, .smallcal-week-empty, .smallcal-day-even, .smallcal-day-odd, and .smallcal-day-empty
- In header.thtml, you can now use the new variable {allowed_menu_elements} as an alternative to using {menu_elements}. The new variable takes the $_CONF['XXXloginrequired'] settings into account, i.e. it will only list those entries that the current user has access to.
- The admin/syndication directory, containing feededitor.thtml, listfeeds.thtml, listitem.thtml, and selecttype.thtml has been added.
- Template files comment/comment.thtml and comment/thread.thtml have been added and comment/startcomment.thtml has been changed to implement template-driven comments.
Please note that comment/comment.thtml was changed again in Geeklog 1.3.9rc2.
- A {link_edit} variable has been added to links/linkdetails.thtml so that admins can edit links directly from the links section.
- An "edit" icon has been added: images/edit.gif. The new variable {edit_icon} can be used as an alternative to {edit_link} in the story template files and in links/linkdetails.thtml.
- In the calendar/calendar.thtml file, the "mode" parameter has been added to the << and >> buttons, so that users stay in their personal calendar when browsing through months.
- A new file, admin/group/groupmembers.thtml, has been added and admin/group/listitem.thtml has been changed for the new alternative option to add users to groups.
- A new file, admin/block/listside.thtml, has been added and admin/block/listitem.thtml and admin/block/listblocks.thtml have been changed for the enhanced block list.
- A {google_paging} variable has been added to admin/link/linklist.thtml. Also added a column number to linklist.thtml and admin/link/listitem.thtml.
- All template files where the user can enter a URL are now using a new variable, {max_url_length}, instead of a hard-coded number of characters for the max. length of the URL. Files affected: admin/block/blockeditor.thtml, admin/event/eventeditor.thtml, admin/link/linkeditor.thtml, admin/topic/topiceditor.thtml, submit/submitevent.thtml, submit/submitlink.thtml.
- The hard-coded has been removed from the {welcome_msg} variable. The blank was then added to the header.thtml of the Classic, XSilver, and Yahoo themes (the other themes either look fine without it or didn't use {welcome_msg} in the first place).
- An extra table has been removed from the users/profile.thtml file of the XSilver theme so that the username now lines up properly with the other entries.
Theme changes in Geeklog 1.3.8 were mostly aimed at moving as much of the hard-coded HTML into template files as possible. Other changes were made to give theme authors better control over the layout and a small portion of changes were done to incorporate new Geeklog features.
New template files
This is a list of the new files. You can safely copy these over from one of the standard themes that ship with Geeklog (most of these files contain HTML that was previously hard-coded into Geeklog).
adminoption_off.thtml
loginform.thtml
topicoption.thtml
topicoption_off.thtml
useroption_off.thtml
admin/database/listbackups.thtml
admin/database/listitem.thtml
admin/user/edituser.thtml
admin/user/plainlist.thtml
comment/commentbar.thtml
comment/startcomment.thtml
pollbooth/pollanswer.thtml
pollbooth/pollblock.thtml
pollbooth/pollcomments.thtml
pollbooth/pollresult.thtml
pollbooth/pollvotes_bar.thtml
pollbooth/pollvotes_num.thtml
preferences/boxesblock.thtml
preferences/commentblock.thtml
preferences/deleteaccount.thtml
preferences/digestblock.thtml
preferences/displayblock.thtml
preferences/displayprefs.thtml
preferences/excludeblock.thtml
preferences/language.thtml
preferences/privacyblock.thtml
preferences/profile.thtml
preferences/theme.thtml
preferences/username.thtml
preferences/userphoto.thtml
search/resultauthdatehits.thtml
search/resultrowenhanced.thtml
search/resultsummary.thtml
search/resulttitle.thtml
users/newpassword.thtml
Note: preferences and admin/database are new directores. Changed /
updated template files These files have changed since Geeklog 1.3.7, i.e.
they may contain new variables, table columns, etc.
If you haven't changed these files in your existing theme,
it is probably best to simply copy them over from one of the themes that ship with Geeklog
(with the exception of style.css and header.thtml
, see below). style.css (see below)header.thtml
(see below)admin/block/blockeditor.thtml
admin/block/listblocks.thtml
admin/block/listitem.thtml
admin/event/eventeditor.thtml
admin/event/eventlist.thtml
admin/event/listitem.thtml
admin/group/grouplist.thtml
admin/group/listitem.thtml
admin/story/liststories.thtml
admin/topic/listitem.thtml
admin/topic/topiceditor.thtml
admin/topic/topiclist.thtml
calendar/editpersonalevent.thtml
calendar/eventdetails.thtml
search/searchform.thtml
search/searchresults.thtml
submit/submitevent.thtml
users/getpasswordform.thtml
In style.css, four classes have been added that are used in the new search code of Geeklog 1.3.8. Instead of copying over the entire file, you will probably only want to copy over the code for those four classes: searchAuth, searchDate, searchHits, highlight.
If the header.thtml of your theme is using the {menu_elements} variable, then you do not need to make any changes to it. If it is not using that variable, then you will need to make one change to it. In that case, search your header.thtml for the link to the story submission form, i.e. something like
<a href="{site_url}/submit.php?type=story">
and change it to read
<a href="{site_url}/submit.php?type=story{current_topic}">
Removed template files
If you have a file named commentheader.thtml in your theme directory, you can safely remove it. It isn't used at all.
Please note that all the following changes are optional. Themes made for Geeklog 1.3.6 will work just fine with Geeklog 1.3.7 - no changes are necessary.
New features and improvements
- Theme-based topic icons are now supported by setting $_THEME_URL in the theme's functions.php file. The variable should point to a directory that has the same hierarchy as Geeklog's images directory (note that the path to topic images is stored relative to Geeklog's public_html directory).
Example:$_THEME_URL = $_CONF['layout_url'];
- The $_BLOCK_TEMPLATE "hack" can now be applied to the What's Related and Story Options blocks, as well. Use whats_related_block and story_options_block as the block names.
- The What's Related and Story Options blocks are now available as separate variables using {whats_related} and {story_options}, respectively (the {whats_related_story_options} variable for both blocks is still available).
- Several new variables can now be used in the story templates, e.g. {contributedby_fullname} for the full name of a story author and {contributedby_photo} for his/her user photo.
- When the new config variable $_CONF['showfirstasfeatured'] is set to 1, then the first story on every page is rendered using the template files for featured stories, even when the story is not marked as featured.
Other changes
- The template file admin/plugins/installform.thtml has been removed since it isn't used any more.
- Two new optional template files, admin/plugins/newpluginlist.thtml and admin/plugins/newlistitem.thml, have been added to support formatting of the list of plugins which haven't been installed yet. If these files do not exist, hard-coded HTML is used to present the list.
- The template file admin/link/listitem.thtml has been changed so that all the links are clickable.
- COM_pollResults() doesn't use the side block templates any more when called from pollbooth.php. Therefore, you can now use different layouts whether the poll results are displayed in a side block or on the separate poll results and comments page.
- Removed the Normal / Archive / Refreshing drop down menus from the admin story and poll editors of the themes that ship with Geeklog. The setting of this dropdown isn't used in Geeklog anyway and has just confused users in the past ... (files admin/story/storyeditor.thtml and admin/poll/polleditor.thtml)
There have been a lot of changes in the themes for 1.3.6 to get rid of the last pieces of hard-coded english texts so as to make localisation easier. Most of these changes have been made in the Admin editors (admin directory) and the calendar (calendar directory). If you created your own theme for an earlier version of Geeklog, we recommend that you copy over these two directories from one of the themes that come with Geeklog (choose one that is similar to your own theme or which it was originally based on). It seems like most Geeklog themes didn't change these files anyway, so this shouldn't be too much of a hassle ...
Other changes
- The template file admin/mail/mailform.thtml has been added. This form for sending emails to other users of the site was previously hard-coded into Geeklog.
If you followed the above advice and copied over the admin directory to your theme, you got this file already.
- Two new files menuitem_last.thtml and menuitem_none.thtml have been added to give theme authors better control over the items in menu bars ({menu_elements} and {plg_menu_elements} variables in header.thtml). The template file menuitem.thtml is now used to render the first and any following menu items - with the exception of the last menu item, which is rendered using menuitem_last.thtml. If there are no menu elements for a menu bar, menuitem_none.thtml is used.
- New files have been added and the existing files have been changed for the links section (links directory). Again, we recommend to just copy over those files from one of the themes that ship with Geeklog.
The new files are: categoryactivecol.thtml, categorycol.thtml, categorynavigation.thtml, categoryrow.thtml, pagenavigation.thtml
- The user profile has been extended to include a list of the last 10 stories as well as the total numbers of stories and comments posted by that user. Have a look at the file users/profile.thtml to see the changes or just copy that file over from one of the themes that ship with Geeklog. You should also copy over the file users/storyrow.thtml which describes the block for the last 1o stories.
- The Classic theme has been updated to have an "Edit" link (for StoryAdmins) in every story now.
Files changed: storybodytext.thtml, featuredstorybodytext.thtml
- In the Classic and Digital Monochrome themes the "contact" link now points to the form to send an email to the admin user instead of using a mailto: link with the site's email address from config.php.
CSS changes
- The underscore '_' is not a valid character in CSS. Therefore, some class names used by the Geeklog calendar have been changed to use the dash '-' instead. You may need to change your stylesheet accordingly.
Names that changed: cal-oldday, cal-today, cal-futureday, cal-nullday, weekview-curday, weekview-offday
- A new class named pagenav can be used to format the paged navigation.
Please note that this change was made after the release of Geeklog 1.3.6rc1 and affects the use of the paged navigation in admin/user/userslist.thtml and links/links.thtml: In 1.3.6rc1, the navigation was wrapped in <p> tags in those files. As of Geeklog 1.3.6 however, the function producing the navigation will wrap it in a <div> automatically.
Note: Theme authors are encouraged to specify a character set in the header.thtml of their themes like this:
<meta http-equiv="Content-Type" content="text/html; charset={charset}">
Geeklog will replace the {charset} variable with the proper character set based on the currently used language file. Also make sure that you put the above line before the <title> tag in the <head> section of your header.thtml file.